Film Noir and it’s translation into stills photography.

Film Noir and it’s influence upon Street Photography.

Film Noir was first used during the 1940s and was used to describe the type of American crime drama that portrayed a dark mood.

In more recent times we’ve had the Nordic Noir television detective dramas such as ‘The Killing and ‘The Bridge’. Based around somewhat disturbed characters with underlying personal problems and set in dark and dismal locations.

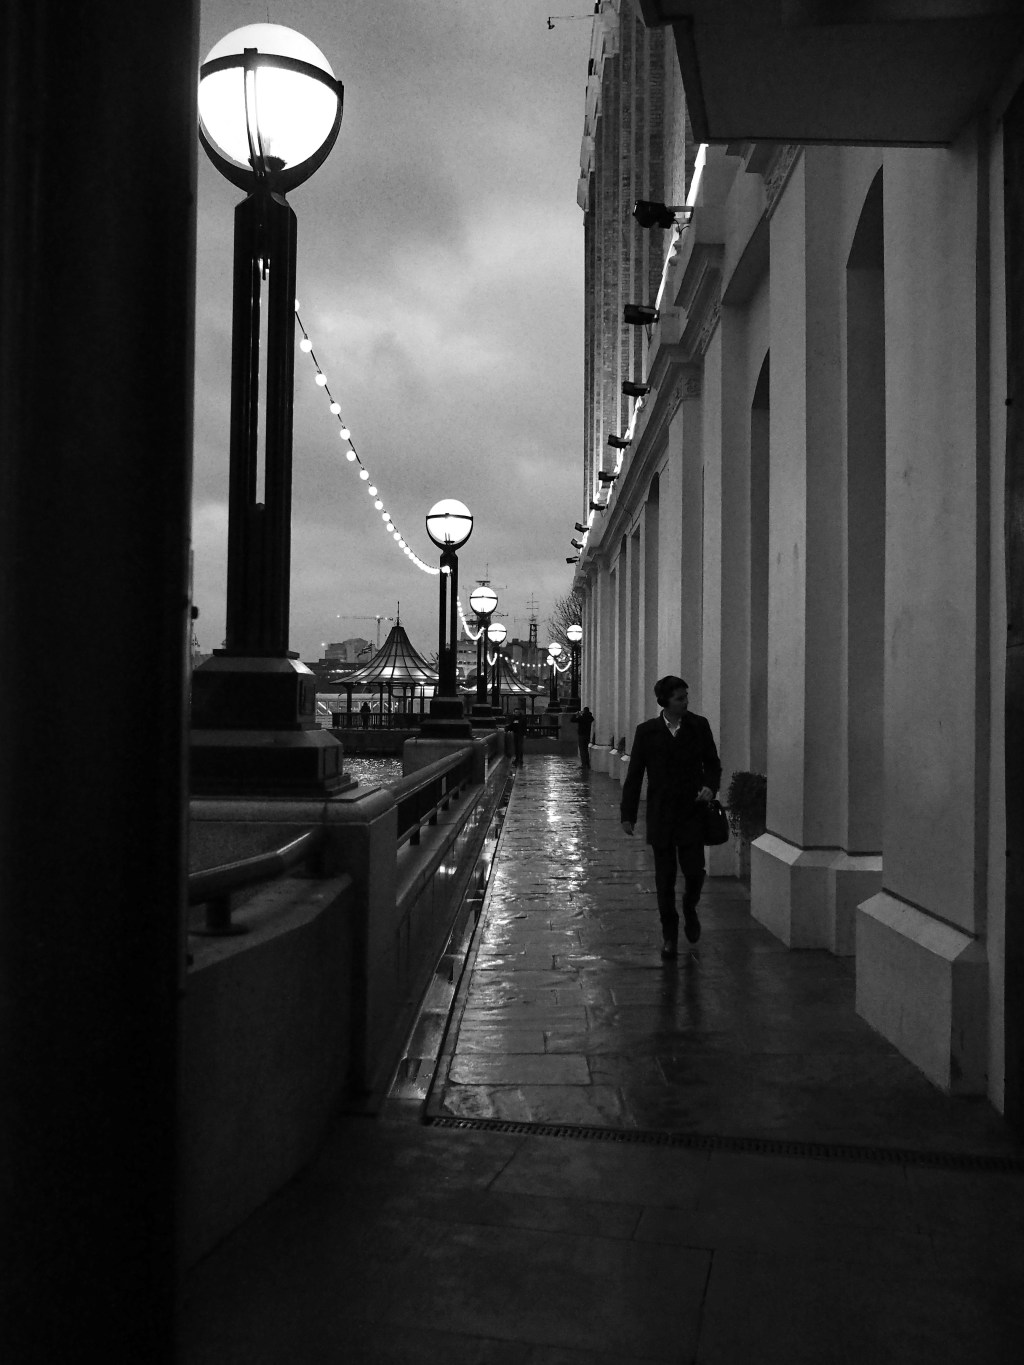
So, what is Film Noir and how does it translate into Street Photography. It’s more about the visual element for us photographers. The scene can be set at night, maybe on a misty evening and a single character walking the streets. The term Liminal Space comes to mind also. It’s some location that engenders a feeling of unease that something could be amiss. All these elements can add atmosphere to our Street photography. It’s often what isn’t shown that can be all important but what we imagine is in the shadows.

Daniel Sackheim the American film and TV director is an example of a cinematographer turned to still photography and the genre of film noir to enhance his photographs and give them atmosphere:

https://www.thephoblographer.com/2020/07/27/daniel-sackheim-director-on-true-detective-returned-to-photography/

Agfa Optima 1035 Sensor verses Olympus Trip 35

Some time ago, after watching Max on Analogue Insights on YouTube do a review of the Agfa Optima 1035 Sensor I acquired one at a good price off Ebay. As a lightweight and compact camera it is ideal for Street Photography. More recently I have also purchased an Olympus Trip 35 and the one thing I realised was how similar these two small analogue cameras are in their functionality.

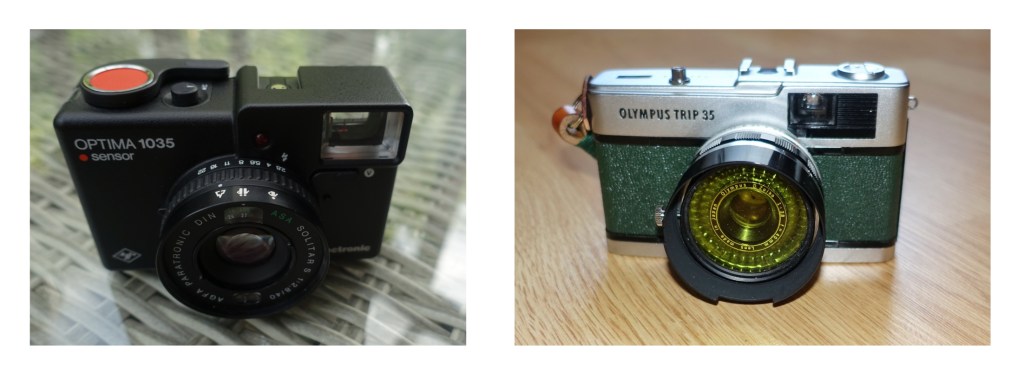
Agfa Optima 1035 Sensor on the left and Olympus Trip 35 on the right.

They are quite different in their appearance, the Agfa being made of metal and coated with a black plastic grained paint finish and the Olympus being of metal but with a chrome and leatherette finish.

Both cameras have a hot shoe for flash.

With the the similarities in mind I thought it would be good to do a photo shoot using both cameras to do a direct comparison. I took them out on a Photo Walk in the town of Saffron Walden in Essex, one of my favourite towns as there are a lot of subjects.

Both of these cameras are of a similar size and sit well in the hand. Both use 35mm film and are of a viewfinder style with fixed 40mm lenses. They both have zone focusing with another scale under the lens showing feet and meter focusing scales for more accurate setting of focus.

Both have zone focusing with a metre and feet scale below the lens barrel.

One major difference between the cameras is that the Agfa needs batteries to operate whilst the Trip 35 has a selenium cell meter that doesn’t need any batteries. The Agfa’s batteries are located inside the back cover of the camera so if you need to replace them you have to open the back which is a bit of a nuisance as you then fog the film. The saving grace here though is that the Agfa has a rather neat arrangement whereby you load the film on the right hand spool and then it unloads into a light resistant enclosure to the left so you should only fog one or two frames when changing batteries mid-roll. Not to be recommended that you do it in bright sunlight however.

The Agfa viewfinder on the left with the sliding scale to show the zone you are set for and the Trip 35 on the right with the small window showing the zone.

Both cameras have nice, bright viewfinders although the Agfa wins out slightly here with a very bright one with information about the zone focusing. The Trip does have a small mirror in the viewfinder that shows what focus you are on but not as clear as the Agfa.

Agfa Optima 1035 Spec.

Technical Specifications

Type : Film 35 mm camera 24 x 36 mm (35 mm).

Lens: Color – Solitar S f2.8 / 40 mm ( 4-element) with multi-layer coating (MC), ØS 49 mm x 0.75, distance range 0.9 m – Infinity.

Shutter: Electronic Paratronic shutter 15-1/1000 sec.

Automatic exposure: Fully automatic and infinitely variable control of shutter times and aperture.

Exposure control : Green signal 1/30-1 / 1000 sec. Red signal 1 / 30-15 sec.

Film Sensitivity : 15-28 DIN 25-500 ASA.

Viewfinder: (V1: 0.78) with parallax marks, distance symbols reflected.

Flash: Flash time setting when the flash unit is pushed in, manual aperture setting via quick switch lever, acoustic rewind control. Self-timer.

10 sec delay time with optical release – advance notice.

Filter size: 49mm.

Dimensions: 102 (width) x 69 (height) x 55 mm (depth) Weight 305 grams.

Olympus Trip 35

Technical Specifications

Film size: 24 × 36 mm (35mm).
Lens: D. Zuiko F2.8, 40 mm. (4 elements in 3 groups).
Shutter: Programmed system. Automatic: 1/40 sec. or 1/200 sec. Manual: 1/40 sec. X sync.
Film rewinding: Crank type with rewinding button setting system.
Focusing: Zone focusing system (4 zone indicators) with distance scale (in meters and feet).
Exposure meter: Automatic exposure adjustment by built-in electric eye meter.
Light measuring range: EV 8 – EV 17 (ASA 100).
Film speed setting: ASA 25 – 400.
Filter size: 43.5 mm (screw-in).
Accessory shoe: Cordless flash contact.
Viewfinder: Luminous bright frame finder (Magnification 0.55) with parallax correction mark and zone indicators.
Film winding: Rear wind-on wheel. Self-cocking to prevent double advances and double exposures.

Size & weight: 115 (width) × 70 (height) × 56 mm (depth) Weight: 410 grams.

So, with a roll of Fomapan 200 loaded in both cameras off I went to Saffron Walden to shoot some images. Here are the results. I used Fomapan 200 film and processed both rolls in the same tank at the same time to ensure consistency between each film.

The column on the left are those taken with the Agfa Optima 1035 Sensor and those on the right are taken with the Olympus Trip 35.

Shutter speed: One of the differences between the two cameras is that the Trip 35 has only two shutter speeds, 1/40th or 1/200th and the Agfa has an infinitely variable electronic shutter. So in theory, the Agfa should be able to handle more different exposure situations. Looking at the difference between Figure 7 and 8 above though I think I prefer the handling of the exposure by the Trip 35 as it seems to have more contrast.

Aperture: Both of these cameras have automatic control of the aperture.

Film Speed: The film speed range can be a bit of a limitation on these cameras if, like me, you are in the habit of wanting to push film to 800 or 1600 ASA. The Trip 35 only goes as far as 400 ASA and the Agfa to 500 ASA.

Both of these cameras handle a situation on a sunny day and give pretty good results on indoor settings. The Trip 35 locks if it considers the light level too low but you can fool it by just putting the setting on the lens barrel from automatic to f2.8 which is the flash setting and it will then use the 1/40th second shutter speed. The Agfa will just adjust the settings to handle the available light. It does though have a warning light in the viewfinder which flashes green for what it considers a suitable light level and red for insufficient light. It will still take an image.

Filter size: Another difference here is that the Olympus in the Trip 35 have gone for a rather unusual 43.5mm filter size whilst the Agfa has the more traditional 49mm. I think maybe that Olympus were aiming to make more by selling their own filters to suit this unusual thread size. You can however still get some 43.5 size filters on some auction sites online and there is also the option of purchasing a stepping ring to change up to 49mm so not a big problem.

Conclusion.

So, in conclusion, which of these two cameras do I prefer? That’s a very difficult question to answer as I like both of these little cameras very much and am using both. But, at the moment I think I’m favouring the Olympus Trip 35 but I’m not sure why. Maybe it’s the traditional viewfinder styling with satin chrome and the unusual green leatherette finish. This particular Trip was made in 1974. The Agfa Optima is a more futuristic styling based upon German product design of the Schlagheck Schultes design studio in the late 1960s.

Nick Ambrose

Blog site: https://nickambrose.org/

Instagram: https://www.instagram.com/nickspics9999/?hl=en

Two Cemeteries Photo Walk

In the first 50 years of the 19th century London’s population more than doubled from 1 million to 2.3 million. With the increased population came the added problem of what to do with the dead. The parish churches graveyards had become dangerously overcrowded and there were incidents of decaying matter from overcrowded graveyards getting into the drinking water supply and causing epidemics.

The answer was to create more private cemeteries outside central London. In 1832 Parliament passed an act encouraging such cemeteries. Over the following decade seven new cemeteries were established. These were Kensal Green (1833), West Norwood (1837), Highgate 1839-1860), Abney Park (1840), Brompton (1840), Nunhead (1840) and Tower Hamlets (1841).

The group at the entrance to Brompton cemetery at the start of the walk. This is a digital image.
My setup for the days shooting. Olympus OM2n. Zuiko 35-105 f3.5 zoom lens. Zuiko 135mm f2.8 lens. Ilford Delta 3200 Pro film. (digital image)

Looking for a location for a walk with the London Film Photography group on Meetup I thought a cemetery might be good for some atmospheric images. It might seem a bit morbid to some but our old cemeteries are a great location for statues and textures on the graves. They can even be quite good for some nature shots.

So, this month we set off firstly to Brompton Cemetery. Designed by Benjamin Baud, it was designed to be an open air cathedral with an impressive central colonnade leading to a domed Chapel. Not the oldest but the 39 acres is full of monumental statuary and is the resting place for the suffragette leader Emmeline Pankhurst and public health pioneer John Snow to name a few. They also have a nice little cafe at the North Lodge entrance.

The weather held out for us with just a few spots of rain but it did mean we had some interesting cloud in the sky.

The equipment that I used was my Olympus OM2n and the Zuiko 135mm f2.8 lens and the Zuiko 35-105 f3.5 lens. I started off with the film that was already in the camera, a Fomapan 200, which proved to be a bit slow for the overcast weather. I also had with me a roll of Ilford HP5+ and a roll of Ilford Delta 3200 Pro. I was keen to try out the Delta 3200 and shoot it at 1600 iso as I thought the graininess of this fast film would suit the subject matter. It would also mean that I could use a filter on the lens to improve the sky rendition and the contrast. As I was using a telephoto lens I also wanted a fairly fast shutter speed. Al the imags in this article are shot on the Ilford Delta 3200, shot at 1600 and developed in Rodinal for 28 minutes at 20 deg c.

We spent an hour and a half at Brompton which proved to be not long enough to explore the 39 acres so it looks like we will have to go back again.

A lot of patience was required to capture the crows!

After lunch at the North Lodge cafe we set off further north for Kensal Green cemetery.

Built in 1833, Kensal Green is the oldest of the public cemeteries now known as the Magnificient Seven and includes in its now the resting place of HRH Duke of Sussex and his sister Princess Sophia. At it’s heart is the Greek Revival Anglican Chapel and the landscape includes 161 designated monuments and other structures.

We spent another hour and a half at Kensal Green but again this proved to be not long enough to explore a lot of it’s 77 acres of grounds. We ended our tour by going to a local pub before wending our various ways home after a very nice day.

What can we, as photographers, learn from fine art?

Chiaroscuro.

In our photography we use well established rules to help us compose our images. Although one shouldn’t be too restrained by so called ‘Rules’ they do provide a starting point, when learning, to compose a pleasing image. These compositional rules have been well established for years and been used by artists.

There are also other aspects of fine art that can be helpful in creating a good image with impact. We have discussed in the past how we can use ‘figure to ground’ in photography to make a subject stand out by contrast against the background.

Many Street photographers adjust their exposure value to create dark shadows devoid of any detail which creates a dynamic graphical shape within the image. They may also use direct light to illuminate the main subject within that dark graphical shape.

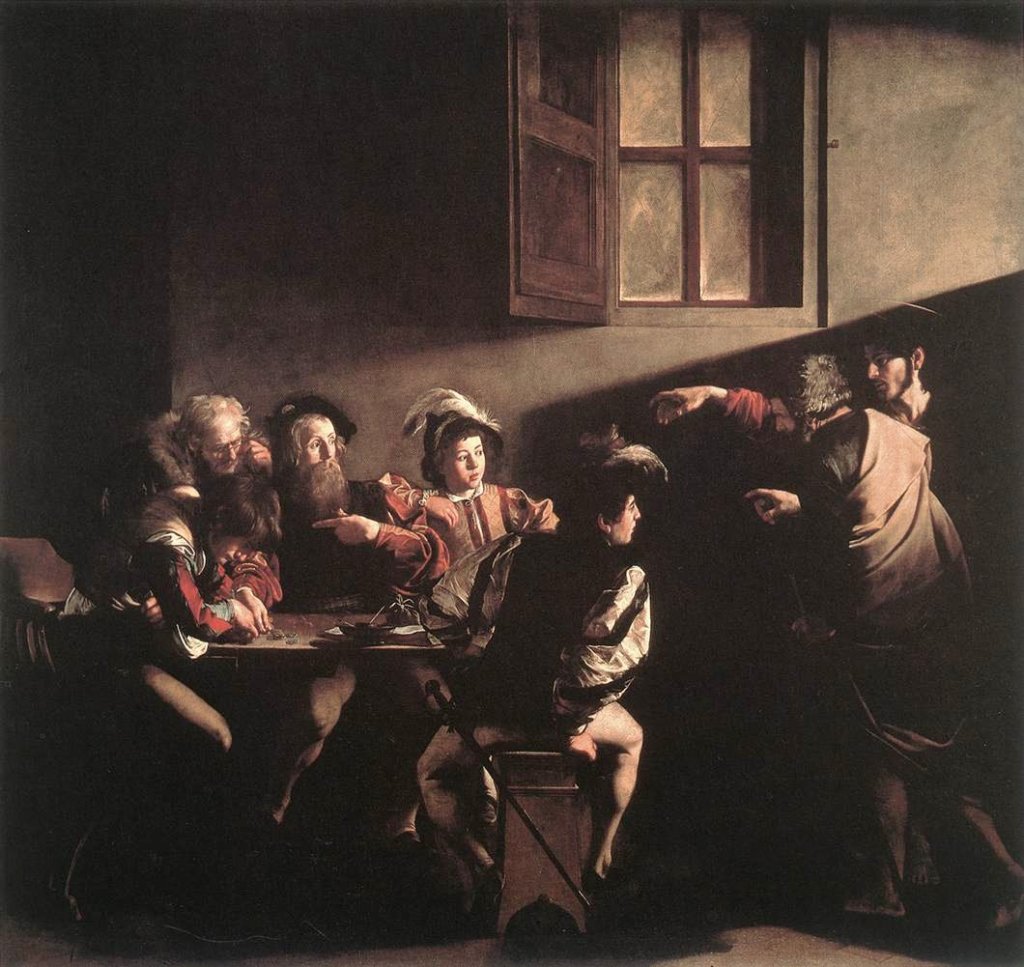
This method of creating an image with strong contrasts between light and dark is known as Chiaroscuro, an Italian word literary meaning ‘Light-Dark’. In painting it is used to suggest volume and modelling in the subject.

A master of the use of chiaroscuro was the artist Caravaggio. A good example of his is ‘Calling of St Matthew’.

Calling of St Matthew by Caravaggio

There is a god video that explains his use of light. See: https://youtu.be/R1lcb_7gj5k

A favourite contemporary artists of mine who also demonstrates a good use of light in their pastel paintings is the Canadian artist Sally Strand.

In her words she explains her use of light within her paintings:

I relate to small moments of life that are often overlooked. These moments resonate with me because they are familiar—we see ourselves in them. They sometimes suggest things beyond the obvious. Painting mundane objects or tasks provides me with a challenge to portray the commonplace in a compelling way, to make the usual unusual and worthy of notice. ‘

This is also a good video where Strand explains how she sees the different light values: https://youtu.be/axlnVZjCjNA

Here are some examples of Sally Strand’s work:

Stand development test.

Equipment used

Camera: Pentax Spotmatic 35mm SLR. Takumar 55mm f1.8 lens.

Film: Fomapan 200 shot at ISO 100.

Developer: Fomadon R09 (same as Rodinal) diluted 1+200.

Patterson developing tank.

One of my more recent projects in the darkroom has been to explore further options on how to process my black and white film.

I would in the past just follow the normal method of a 30 second agitation and then 4 inversions of the developing tank every minute. This over the normal timing of somewhere between 8 to 16 seconds depending on film and ISO rating.

The dilution of the developer would be 1+1 of 1+3 for something like Ilford ID11. For Fomadon R09 or Rodinal it would be the normal 1+25 or 1+50 dilution. Temperature would be 20° Centigrade.

I have though seen mention of what is called Stand Development which is using a very dilute developer and just leaving the film tank standing for a very long time, usually about an hour without agitation.

I have in the past been put off by problems others encounter using this method such as bromide drag which leaves streaks on the negatives. It’s always seemed to me to make sense to create the situation where the exposed film emulsion gets influenced by active developer equally across the surface.

However, I thought it might be time to attempt this method on a roll of film exposed for this purpose and wouldn’t be missed if it all went wrong.

I have been reading the books ‘The Art of Black and White Developing’ by John Finch and ‘Ilford Monochrome Darkroom Practice’ by Jack H Coote.

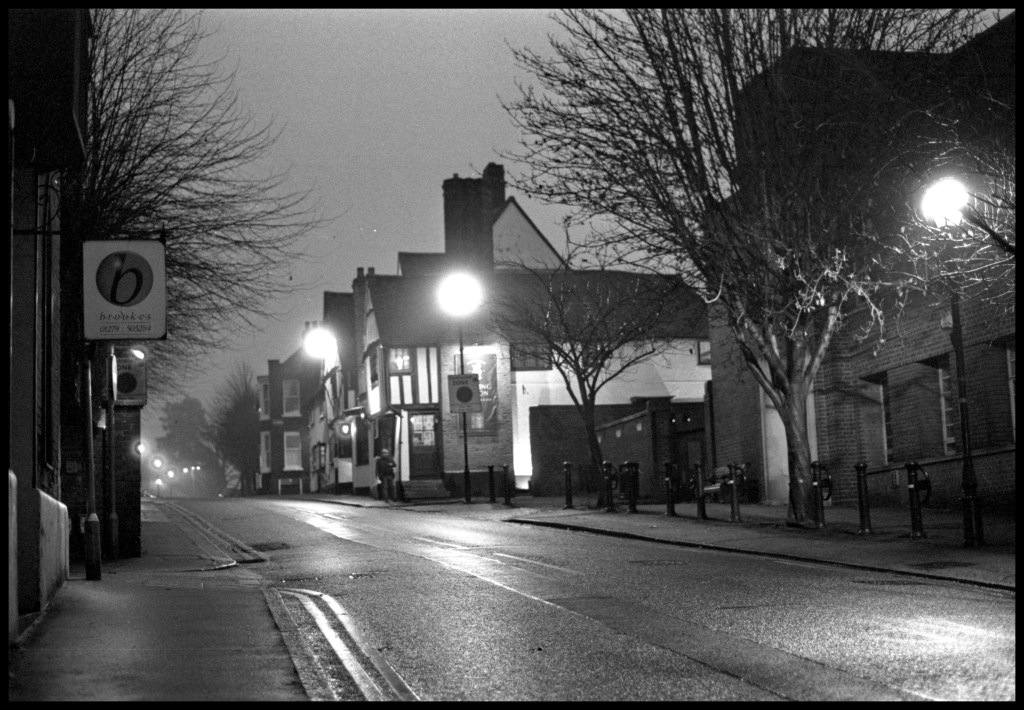
Bishops Stortford on a misty evening.

I was keen to see if I could increase the acutance of the negatives by inducing something called the adjacency effect. This is where bromide, a by product of the action, collects at boundaries of high to low density.

This bromide inhibits local development along the line of these boundaries and creates what is known as a Mackie line which increases perceived sharpness along these lines. The one problem of this release of bromide is that it can also cause streaking on the negatives caused by the bromide falling to the bottom of the tank when it is left standing without agitation.

Bishops Stortford on a misty evening.

So, having thought I would give stand development a try I read in the ‘Art of Black and White Developing’ that Rodinal type of film developers are good for this style of stand developing.

It was recommended that the dilution was 1+200 and the development time be 2 hours so that is what I decided to use. I chose Fomadon R09 developer which is a similar type to Rodinal and the film I chose was Fomapan 200.

I stood the developing tank in a water bath at 20° centigrade so that the temperature wouldn’t drop too far during the 2 hour time.

Bishops Stortford on a misty evening.

I shot the film at 100 ISO rating to ensure good detail capture in the shadow areas.

The images were taken on some very dim and misty days in December and I was very pleased with the results and didn’t get any bromide drag streaks on the negatives. I will definitely try this method again.

Bishops Stortford on a misty evening.

The first series show the evening shots. I also took some on a very dull day on a walk along an old unused railway line.

Along the old Buntingford branch line.

Three Mills, shit and sugar – A lovely walk.

Having set myself a task of walking the 78 miles of the Capital Ring walk around London over the next year and setting my start point at Hackney Wick I decide it would be a good idea initially to do a walk around the area of the Olympic Park area. I wanted to explore some of the history and industrial heritage of the area. A good precursor for the start of the walk.

The walk of 3 miles started at Pudding Mill lane and followed some of the Greenway running through this part of London. The weather was dry but it had got colder than it had been recently.

Docklands Light Railway.

Due to engineering works we had to get the train into Liverpool Street, then tube to Bank where we got onto the DLR to Pudding Mill Lane, the start of the walk.

Starting off on a North West direction under the railway we found a great cafe at the Olympic Park and started the day with a bacon bagel and coffee.

Olympic Park

From there we followed the Greenway and Victoria Walk North West as far as the crossing of the Lea Navigation.

The Greenway, formerly known as Sewerbank, is following the course of the Northern Outfall Sewer which is part of the London sewage work carried out by Joseph Bazalgette.

Bazalgette built London’s first sewer network in the 19th Century and was responsible for wiping out Cholera in the capital. The sewers took 16 years to build and are still in use today.

Alongside the River Lea.

Going down on the track to the left before the bridge over the Lea we then took a course South alongside the River Lea Navigation. At this point the sewer crosses the river overhead in an enormous steel construction.

The steel construction which supports the main Northern outfall sewage pipes over the River Lea.

The path was dry and there much to see with boats along the river.

There are many colourful and interesting narrowboats along the canal.

An interesting building across the others side of the river is the Bow Quarter which is the old Bryant and May match factory, redeveloped in the 1980s it is now flats and town houses.

Just before the Bow flyover we had to jiggle round the river at the point where the river splits to travel North East and becomes St Thomas Creek.

Crossing over to the other side of the river we go as far as Three Mill Lane where we cross the river again onto Three Mills Island.

There are references to mills on this site in the Domesday survey of 1086 which is considered to be the earliest record of a mill system in England.

The current mills were bought in 1727 by three local Huguenots. It was a good location for mills with the strong tidal flow giving eight hours of power per tide.

The mills are currently film studios with programs such as Masterchef being filmed there.

Continuing North we travel alongside Three Mills Wall River and stop off at Three Mills Green for a late lunch of sandwiches. East of us across the Prescott Chanel, a tributory of the Three Mills Wall River, are the original and new Abbey Mills sewage pumping stations, something we will be visiting on our next walk.

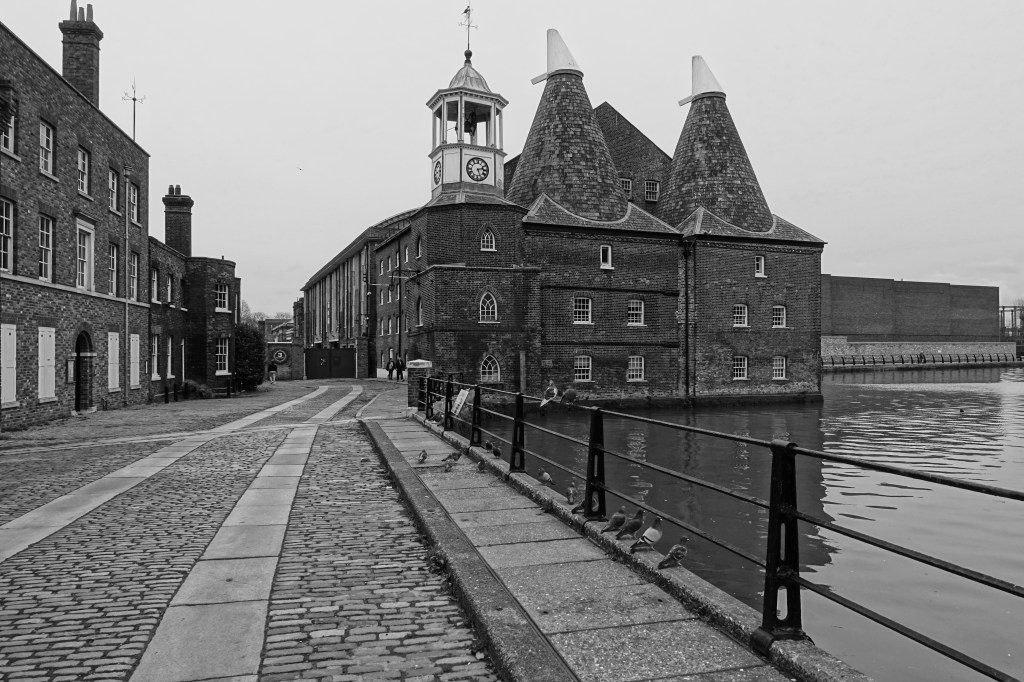
As we continue North we can see to the West of us Sugar House Island. The Island is named after a striking 19th century five-storey red brick warehouse which still stands on site.

As we arrive at the A118 High Street we cross over to continue our walk back in a Westerly direction to the end at our start point at Pudding Mill Lane DLR station. Before continuing though we stop on the A118 to admire the old Yardley box factory and offices.

Photographing an event. Cressing Vintage Fair.

The Vintage Day at Cressing Temple Barn in aid of Helen Rollason Cancer Charity.

Back in January 2020 I enrolled on a Street Photography course with Magnum Photos. See: https://www.magnumphotos.com/shop/learn-with-magnum/

Little did I know that within three months we would be all locked down and unable to travel far. Well, that put a stop to my course. I’d gone as far as Martin Parr teaching how to photograph an event only to be at a point where there were no events taking place.

Jump on about 15 months and I had an opportunity to go along to a vintage fair in aid of the Helen Rollason Cancer Charity and photograph the event. The Vintage fair is now in it’s 11th year. I had been involved, along with some other members of our local camera club, in photographing events put on by this charity. This was an ideal opportunity to catch up with my course and make some images of an event and also try to make some money for the charity. We would take the photos and then supply them to the charity so people who attended the event could buy them from the charity web site.

As it was a vintage event I also thought it a good opportunity to try out a recently acquired vintage camera. A Mamiya C330 ‘Professional f’ twin lens reflex (TLR) which was produced from 1969 and using Kodak Ektar 100 colour film. Maybe the colour film was a bit recent for some of the eras portrayed at the event but I was anticipating some colour in the attire and the classic cars on display. I wasn’t disappointed!

The Mamiya C330 Professional f camera used to photograph the event. I used Kodak Ektar 100 colour film.
Many of the visitors dressed in period costume.
The girl singers, the Harmonettes were performing at the show.
the Harmonettes
More visitors entering into the theme of the show.

There were also may vintage cars and motorbikes on show.

I had anticipated there being a few old vintage cars around at the event and had thoughts of trying to get some close up views of the colourful cars. With the Mamiya TLR you have to allow for parralax error because the image taking lens is below the viewing lens. When you get up close the image taken isn’t quite the same as that which you are viewing. The Mamiya C330 gets round that by having a line move down the viewfinder showing the top of the image that is captured. It seems to work very well as I got the shots I was after.

E-Type Jaguar dashboard.
There were some interesting old motorbikes there too!

After getting through a couple of rolls of colour film I tried out the camera with some black and white film. I used Ilford fP4+ which I was able to process myself at home.

The band provided some great music for people dance to whilst maintaining social distance.
An interesting V-Twin engine in a Morgan three-wheeler.

A great day out with many photo opportunities. Think I’ll have to go back next year.

Helen Rollason Charity: https://www.helenrollason.org.uk/

A series on Anglesey Abbey

For this series I used my 35mm Olympus OM2n and 50mm lens. The film was Ilford FP4 developed in Ilford ID11 developer for 11 minutes @20 deg C.

The negatives were scanned to digital copies on my Epson F3200 film scanner and finally finished with some post processing using Affinity Photo.

Anglesey Abbey located in the village of Lode in Cambridgeshire is a favourite location of mine for some photography. The present property which is now owned by the National Trust was built on the remains of a priory which was demolished during the days of the dissolution of the monasteries in 1536.

I’ve been there a few times as i like the fact that not only is there the house itself to photograph but many statues around the grounds.

The house is a Jacobean style mansion built around 1600. Owners throughout the centuries include Thomas Hobson and his parker descendants and the last private owner was Lord Fairhaven who lived in the house from 1926 to 1966. Fairhaven made extensive additions to the house to accommodate his collection of furniture and objets d’art. He also had the grounds landscaped. When Fairhaven died he left the house and it’s contents to the National Trust.

Pre-visualisation in photography

Pre-visualisation is a big word but it basically means seeing the image before you’ve even seen the image.

In Street photography you can often be bombarded with visual stimulus. So, to prevent being overwhelmed when presented with potential subjects, especially in places such as markets, it is a good idea to have in your mind the type of subject you are looking for.

On a recent trip into London I had planned on photographing around The Barbican. I particularly like the Brutalist style of architecture and it’s gritty concrete facades and dynamic shapes. So the obvious choice for me was to take a film camera loaded with black and white film to capture the tones and textures of the buildings.

I was however aware that the walk from Liverpool Street station to the Barbican was to take me through areas of contemporary steel and glass architecture. So, I also had it mind to capture some images using shop fronts and reflections in colour. So, with this in mind I also packed my little Sony RX100 camera.

Red is the colour.

The first thing that drew my eye was the advertising board inside this shopfront window. I wanted to capture someone in red in front and as luck would have it, this lady was some distance away. I just had to wait for her to position herself in front of the window. As often is the case, she was meandering around whilst talking on the phone. So it was just a case of waiting for her to arrive where I wanted her with the girl on the hoarding looking down on her.

Blue is the colour.

Whilst in the Barbican I saw this blue coloured vent tube and the fact that the distant windows were also of a blue tint. I could have just taken the shot without anyone but I had a visual idea that the image would look so much better with someone wearing blue also in the shot. It was a lucky day for me as I stood there for a while and then the lady in blue just came along to look at the sign and the image was made. I could have made the image without the person but that is an image that I could repeat on another day as the vent tube and windows are always there. It’s the human element in a matching colour that makes it unique.

So, instead of just wandering the streets snapping away at uninteresting street scenes without anything much happening try pre-visualising. Use the mind’s eye and form an idea of what it is you’re trying to achieve then look out for how those elements and wait for it all to come together.

Using Affinity Photo

How to create a PDI multi-image document for something like a triptych.

Creating document.

With Affinity Photo open – Click on FileNew

Dialogue box opens – Click on ‘My Presets’ so we can save our document for later use.

Under ‘Layout’ on the right set document units to ‘Pixels’ .

To create a landscape document set width to 1600pixels and height to 1200pixels. Make sure you have the orientation set to ‘Landscape’.

If you want a portrait format you can just click on orientation ‘Portrait

If you want a square format then just change the 1600pixels to 1200pixels.

Other settings:

DPI: 300

Colour format: RGB/8

Colour Profile: sRGB

Before you go any further you can click on ‘+Custom’ at the top and it will save these settings under ‘My Presets’ for later use. If you right click in the preset you’ve just created you can rename it.

Click on: ‘Create

We now have a document of the size open with a white background.

Changing background colour.

At this point you can change the colour of the background. I like to use a 30% grey background.

Go to the tab ‘Colour’ on the right and click on ‘Greyscale

Move the slider to 30 for a 30% greyscale or any other shade you wish to use.

Using the ‘Flood Fill’ tool click on the background and you should now have a 30% greyscale background ready to place your photos on.

Placing images.

Click on ‘File’ – ‘Place’ and chose an image from wherever you have stored your images.

Click and drag on the image background you have created and this will place the first image. Don’t worry too much about the size and position of the image as this can be adjusted once all images are on your background.

Make sure at this stage that you have the ‘snapping’ set to on at the top as this is useful in aligning the images once you’ve placed them on the background. You can move the images to the edge of the background and pick up the centre snap shown as a green line that pops up or move them near the other images to use the alignment of edges snap shown as a red line. You can click on each image and resize and reposition as required until you have the final setup.

You can also place text on your final layout by using the ‘Text Frame’ tool. Text can also be aligned by using the same snap alignment tools.

Text type size etc. can be changed by clicking on font et at the top of the page.

Saving the multi-image document.

Once satisfied then click on ‘File’ ‘Export’ and save your completed multi-image document to wherever you wish to save it.

As well as exporting to an image file of the type of your choice you can also save the file as an affinity file type .afphoto so that you can edit it further later.