How to create a PDI multi-image document for something like a triptych.
Creating document.
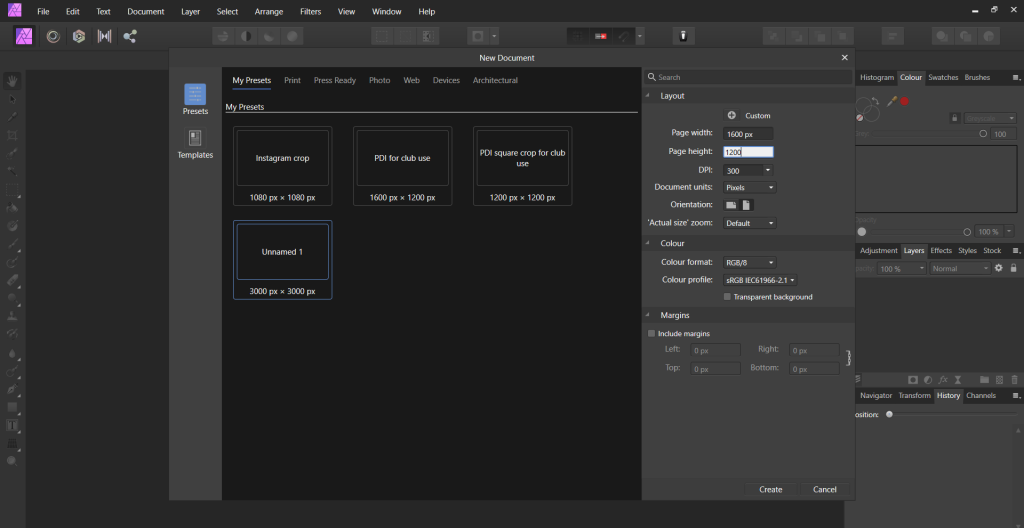
With Affinity Photo open – Click on File – New

Dialogue box opens – Click on ‘My Presets’ so we can save our document for later use.

Under ‘Layout’ on the right set document units to ‘Pixels’ .
To create a landscape document set width to 1600pixels and height to 1200pixels. Make sure you have the orientation set to ‘Landscape’.
If you want a portrait format you can just click on orientation ‘Portrait’
If you want a square format then just change the 1600pixels to 1200pixels.
Other settings:
DPI: 300
Colour format: RGB/8
Colour Profile: sRGB
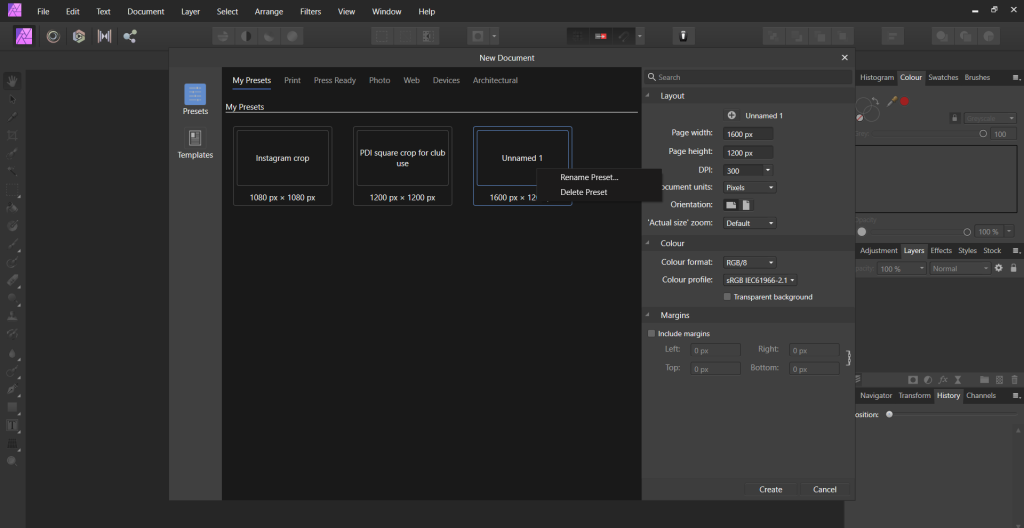
Before you go any further you can click on ‘+Custom’ at the top and it will save these settings under ‘My Presets’ for later use. If you right click in the preset you’ve just created you can rename it.

Click on: ‘Create’

We now have a document of the size open with a white background.
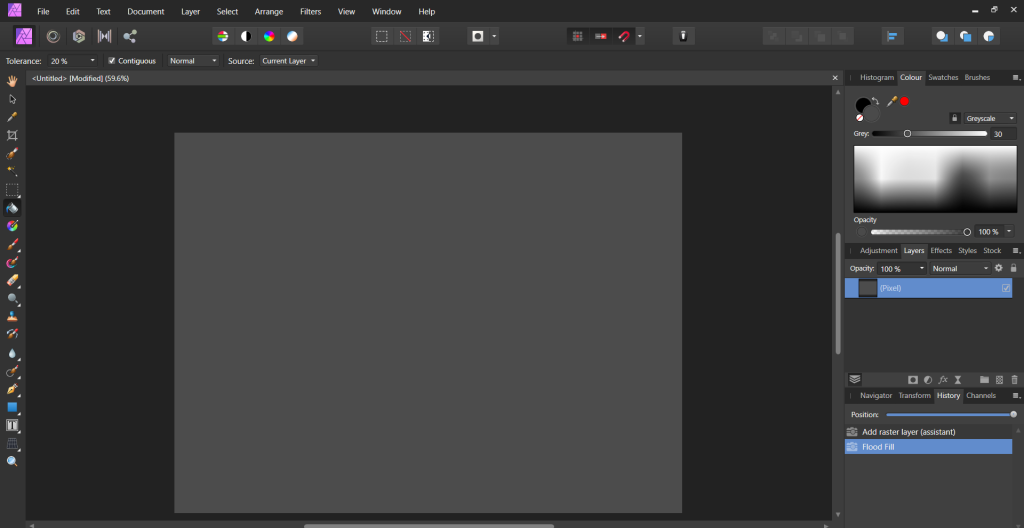
Changing background colour.
At this point you can change the colour of the background. I like to use a 30% grey background.
Go to the tab ‘Colour’ on the right and click on ‘Greyscale’

Move the slider to 30 for a 30% greyscale or any other shade you wish to use.
Using the ‘Flood Fill’ tool click on the background and you should now have a 30% greyscale background ready to place your photos on.
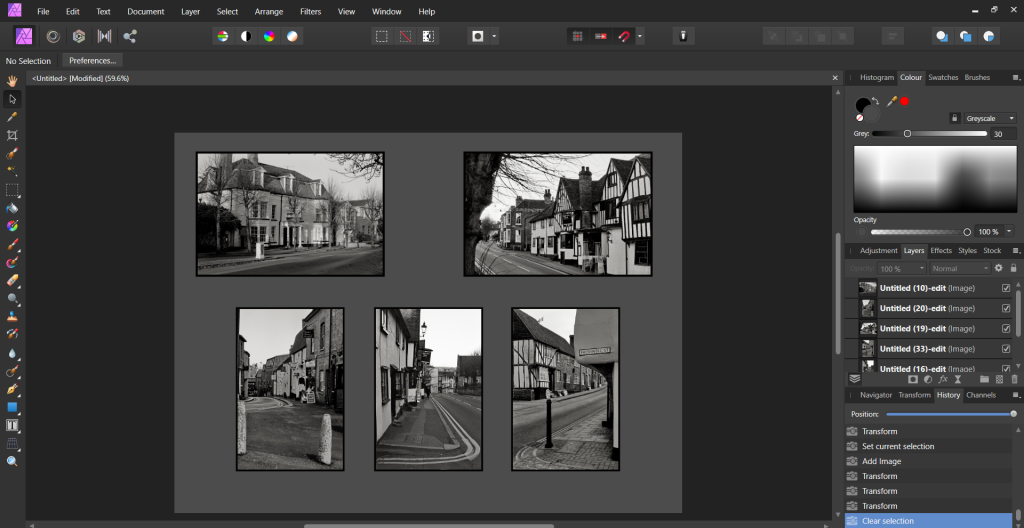
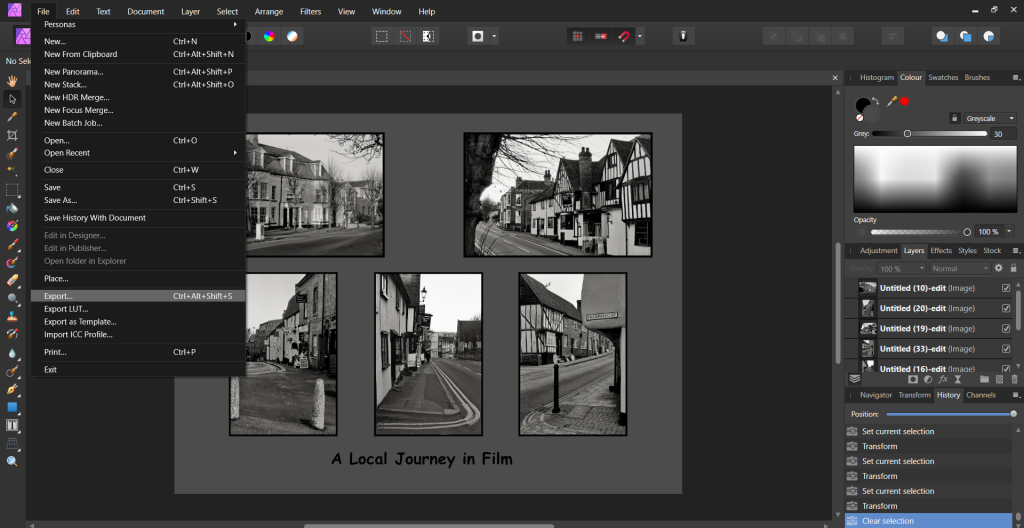
Placing images.
Click on ‘File’ – ‘Place’ and chose an image from wherever you have stored your images.

Click and drag on the image background you have created and this will place the first image. Don’t worry too much about the size and position of the image as this can be adjusted once all images are on your background.


Make sure at this stage that you have the ‘snapping’ set to on at the top as this is useful in aligning the images once you’ve placed them on the background. You can move the images to the edge of the background and pick up the centre snap shown as a green line that pops up or move them near the other images to use the alignment of edges snap shown as a red line. You can click on each image and resize and reposition as required until you have the final setup.

You can also place text on your final layout by using the ‘Text Frame’ tool. Text can also be aligned by using the same snap alignment tools.

Text type size etc. can be changed by clicking on font et at the top of the page.

Saving the multi-image document.
Once satisfied then click on ‘File’ ‘Export’ and save your completed multi-image document to wherever you wish to save it.

As well as exporting to an image file of the type of your choice you can also save the file as an affinity file type .afphoto so that you can edit it further later.

Nick
That’s great, thank you. Just need my pics!
>
LikeLike
Were you able to view the images of the screen dumps OK Dave. They looked a bit unclear to me?
LikeLike