When I retired four years ago I decided to get back into more serious photography as a means of having an interest that I could pursue.
I joined the local photography club and started entering competitions. This was using a modern digital camera. However, I started seeing some good old film 35mm cameras on ebay which piqued my interest in maybe getting back and doing some retro film photography.

So, two years ago I started using old cameras and developing my own black and white films. The negatives would then be scanned to digital copies for use on social media etc.
That then, of course, led me to thinking that wouldn’t it be nice to get back to some old retro printing in the darkroom using traditional silver gelatin printing methods.
I had semi converted our loft in our house to a craft room 10 years ago. I had redirected the electrical wiring and extended lighting and power circuitry. Flooring was the next thing to go down followed by rooflights and insulating between the rafters. We are fortunate that our house has quite a high ridge line so the loft has a high area in the centre without having to disturb the main load bearing structure.

I was also able to create workbench areas constructed off the load bearing trusses down each side of the roof. I was aware that I couldn’t put a lot of load on the roof structure so the way I had done it meant that it could never be used as a proper room and heavy things such as furniture couldn’t be put up there. It was though adequate to allow use for crafts as nothing I was using was heavy.
The room as it was converted was great as a craft room but we never really used it as such as we realized that as we are still capable of going out we would rather be out and about than stuck up in the loft doing crafts. For me the plan was to do model making and for Liz it was bead and card making.
So, we were quite happy to let things go and spend our time going out and the craft room didn’t really get used. Then, along came Covid 19 and we had a lot of spare time on our hands.
So, jump to 9 months ago and my current interest in doing some photographic printing. The first thing I had to do was to make some blackout curtains for the Velux windows. The windows which were a big advantage for craft work were something I could do without in a darkroom where you have to work only with a red safelight.

So, some material purchased from ebay along with self-adhesive velcro and I’d made the blackout blinds for the windows.
Next thing was the equipment required to produce prints from negatives. I used to do photographic printing as a teenager and had kept all the equipment, the enlarger, developing trays, safelight etc but here’s the cruck, when I was going to convert the loft I had decided I wasn’t going to use that anymore in the digital age so had chucked it in the council tip. I had tried giving it away but no one wanted it. At that point everyone thought that film photography had died.
Fortunately for me, 10 years later a fellow member of my photography club was clearing out his garage and wanted to just get rid of all the kit to do printing. It was actually better kit than I had before as that was purchased when I was a penniless teenager rather than a penniless pensioner.
So, next stage was to get all the kit up and running. It hadn’t been used for a while and some of the electronic things didn’t seem to work any more. So things like the enlarger timer were taken out of line and replaced with an ordinary in-line torpedo switch and the timing done with a mechanical timer.
In an ideal world a darkroom should have a wet area but for my room I had to make do with using a couple of the large plastic darkroom trays that I had acquired to wash the prints. All used chemicals and dirty water goes into a bucket and is carried down to the bathroom for disposal.
All set up and ready to go and an order sent off to Ilford Photo for some paper developing chemicals and Kentmere VC Select 10” x 8” silver gelatin paper. I setup an oil filled radiator in the loft. Although the heat from the house would rise up through the open loft door I did need to make sure that the temperature in the room was maintained at around 20 deg C. so additional heating was required.
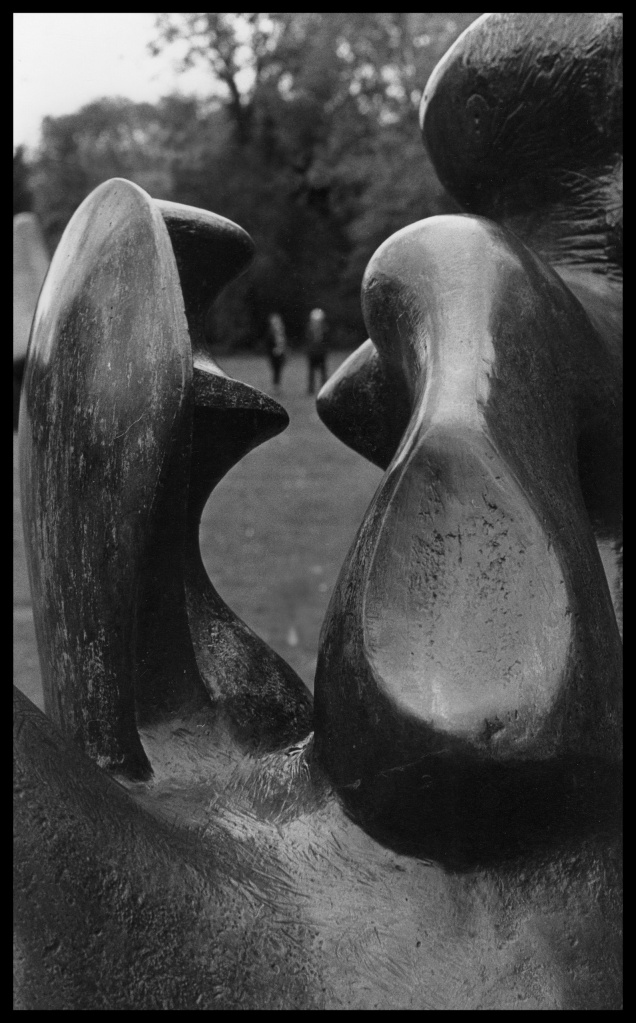
I had been running out of subjects to photograph but fortunately the Henry Moore Gardens in Perry Green had decided to stay open in December so thought that would make a good subject for some film photography.

Whilst I have been using Ilford black and white films by preference I’d also been trying out using some unusual film. One such was Rollei Retro 400s which is actually a film originally produced in Belgium for aerial surveillance (more on that subject in another post). It is what is termed as super panchromatic and is sensitive to more of the red spectrum. I thought it would suit the subject of Henry Moore sculptures very well with it’s increased contrast.
My first trials were to actually test the effectiveness of my blackout arrangements. I set everything up and placed a coin on some photographic paper with all lights including the red safelight off for 20 minutes. Developing this showed no witness of the coin on the paper so that proved the blackout arrangements were OK.
Next test was with the previous arrangement but this time with the red safelight on. This proved that the safelight itself was effective in not fogging the paper.
I was using multigrade paper so set the colour head settings on the enlarger to give a grade 2 mid range contrast and my first set of prints were just to do a couple of test strips. First set 5 seconds apart to get the ball park figure then another set 2 seconds apart. I also established that the photos of the Henry Moore sculptures looked better with a bit more contrast so reset the colour head settings to give a grade 3 paper.
I did some 8” x 10” prints and were very pleased with the results. Unlike when trying to print using an inkjet printer the black were actually a warm tone black rather than a blue hue as produced by the inkjet.
I have also recently processed the higher contrast Rollei Retro 400s film and produced some prints from those which I’ve been very pleased with.


Next stage in my lockdown crafts is to mount and frame some of the photos. I think a set of three framed Henry Moore prints would look good on the wall.

With you every step of the way 😊
LikeLiked by 1 person